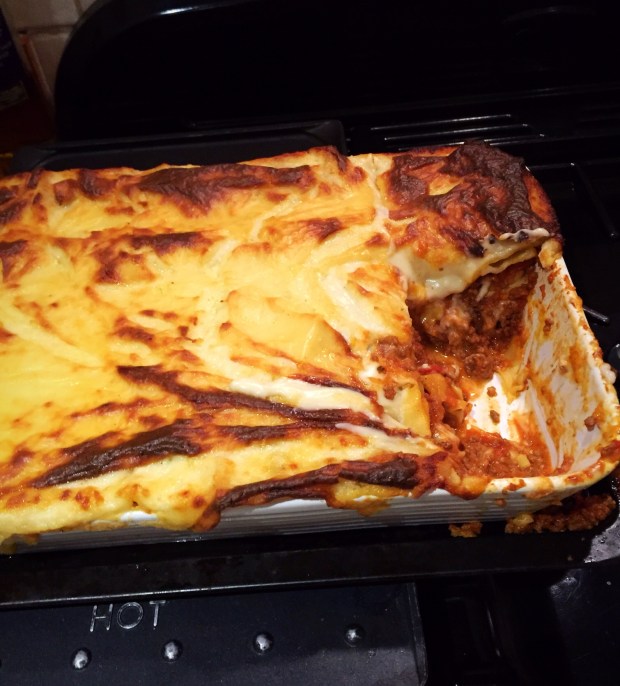
Author: Jennie

LEEK AND POTATO SOUP

Firstly, a very Happy New Year to all my fellow foodies! Β I hope you will join me for another year of super tasty, healthy food.

I got today off to a good start with a rather tasty soup, you can rock this one out in a matter of minutes!!

Leek and Potato Soup

image

4 Leeks, white bits only, trimmed, washed and sliced

1 Onion, finely chopped

2 Medium Potatoes, peeled and finely diced

Glug of Rapeseed Oil

1.2litres Chicken or Vegetable Stock

Dash of White Wine

Bouquet Garni

Maldon Sea Salt and Black Pepper to taste

Dash of Milk or Cream

In a big pot, add the oil and heat. Β Chuck in the onion and soften for about five minutes.

Now add the leeks and soften for another few minutes.

Add a Dash of White Wine and the bouquet garni.

Add the potato and the stock and cook for around 15 mins on a medium/low heat.

Add 100ml Milk and stir.

Remove bouquet garni and whizz!

How easy is that!


MAKE AHEAD ROASTIES

MAKE AHEAD ROASTIES

image

Soooo busy today!! Just a wee quickie to give you the heads up on make ahead roasties!

Peel the potatoes and ensure they are of even size.

Place the potatoes in a large pot of salted boiling water.

Parboil for 8 mins.

Pour potatoes into a colander let them drain thoroughly then shake to fluff up.

Lay them in a single layer in a large roasting tin.

In a separate pot, heat up your chosen type of fat. Β I used goose fat for super crisp roasties!

Pour over all the roasties ensuring that they are all evenly covered.

Cool then put in the bottom of the fridge until tomorrow.

Tomorrow, simply heat oven to 190c and cook for 50 mins or until nice and evenly crisp and golden!

Happy Christmas my lovelies! Xo πŸŽ…πŸΌπŸŽ…πŸΌπŸŽ…πŸΌπŸ’¨β›„οΈβ˜ƒπŸ·πŸ—πŸΎ


LUSH MAKE AHEAD CHRISTM

Lush Make ahead Christmas Gravy

Yes, you can sit with your flour and scrape bottoms of pans etc on Christmas Day……I would prefer more family time than being a slave to the roasting pan!!

I will not lie to you, this is not a quickie! However, once it is done, throw it in the freezer and on Christmas Day you will be counting your blessings!

Make this gravy a few days, or even weeks before Christmas then finish it on Christmas Day.

Serves 6-8

Ingredients

2 Celery Sticks, trimmed and roughly chopped
2 Carrots, roughly sliced
2 Onions, peeled and quartered
5 fresh Bay Leaves (if you can’t find them, just use dried)
5 fresh Sage Leaves
4 sprigs of Fresh Rosemary
2 Star Anise
3 Rashers of Smoked Streaky Bacon, the best quality you can afford.
12 Chicken Wings
Olive Oil
Malden Sea salt and freshly ground Black Pepper
4 tbsp Plain Flour
75ml Sherry or Port(optional)
Preheat the oven to 200ΒΊC Put the veg, herbs and star anise into a sturdy bottomed roasting tray. Scatter the bacon on top.

Break the chicken wings open then put them onto a board and bash the bones up with the end of a rolling pin; this will release more of their flavour.

Put them in the pan, drizzle with olive oil, sprinkle over a few pinches of salt and pepper then toss everything together and put the tray in the oven to cook for 1 hour, or until the meat is tender and falling off the bone.

Take the pan out of the oven, and put it on a hob over a low heat and use a potato masher to really mash everything up.

Keep mashing, moving and scraping all the goodness from the bottom of the pan as you go.

Gradually mix in the flour to thicken the mixture. Let everything fry for a while as this will make the gravy darker.

When your flour is well combined pour in 2 litres of hot water, turn the heat up and bring to the boil for 10 minutes, ensure it has thickened.

Turn down the heat and simmer for about 25 minutes, stirring occasionally.

I can highly recommend at this point adding 60ml sherry or port for flavour.

When it’s reached the consistency you’re looking for, adjust seasoning then push it through a sieve into a large bowl or heavy pot.

Really push and mash everything through so you get as much flavour as possible.

Discard anything left behind. Once it has cooled down to room temperature put it into containers or freezer bags and stick it in your freezer. Phew!! Job done and a little less to do on Christmas Day!

Take it out of the freezer to defrost on Christmas Eve.

On Christmas Day, once the turkey is perfectly cooked, ensure you save all the lush juices from the turkey.

Spoon away as much of the fat as possible, then pour your pre-made gravy into the pan with the rest of the turkey juices. Bring it to the boil over the hob and scrape all those flavourful bits and pieces from the bottom of the pan.
Once your gravy is piping hot, strain it through a sieve and into a pan.

Leave it on the lowest heat until you’re ready to serve. Skim away any fat that rises to the top and add any extra resting juices from the turkey before serving.
This is a gravy you will never forget!

CHRISTMAS STUFFING

Christmas Herb Stuffing

Herby Stuffing

Stuffing made and in the freezer!! I actually prefer the stuffing to the turkey!! The one I have for you is a basic herb stuffing, feel free to change it around, add or take away! Get creative.

The most important thing is, once you are done, bung it in the freezer and forget about it until 23rd!

Pour yourself a large glass of wine to celebrate having one step of a stress free Christmas dinner completed!

You could add 1 tbsp sage, 500g pork sausage meat, apricots or thyme.
1 x 800g Loaf Plain Bread (Nutty Krust) preferably a bit stale, crusts removed and broken into pieces
1 Large Onion skin and roots removed and cut into four.
175g Butter
70g Parsley (remove all the stems. This is roughly 2 supermarket packs)
Sea Salt and Black Pepper

You will need a nice large bowl!

In a food processor add the bread and blitz in batches. Tip each lot into your bowl.

Put the butter in a pot and place on a gentle heat to melt.

Add the onion to the food processor and blitz.

Stir the onion through the bread crumbs.

At this point I would season the stuffing with a generous amount of salt and pepper to ensure it is thoroughly incorporated.

Now blitz the parsley until it is nice and fine and stir it through your mixture.

Finally add the butter bit by bit to bind it all together. You may not need it all but it should be moist but still quite crumby looking.

TARKA DAL

TARKA DAL

image

This is super delicious, super cheap and super healthy! Eat with whole meal chapati or chargrilled chicken…

300g Chana Dal (yellow dried split peas) rinse them until the water runs clear
1 Onion, finely chopped
2 Green Chillies, pricked with a knife
1 tbsp Cumin Seeds
2 in Piece Fresh Ginger
3 Garlic Cloves, peeled and left whole
3 Tomatoes
1 tsp Turmeric
1 tsp Garam Masala
1 1/2 tsp Ground Coriander
Maldon Sea Salt and Black Pepper
A Handful of Chopped Coriander leaves
Coconut oil or Rapeseed Oil

Once rinsed, place the lentils and 1 litre water to a pan, bring to the boil and stir. Skim off any froth.

Reduce to a simmer, cover with a lid and simmer for around 40 mins. Add some more water if necessary.

When done, drain any excess water out, whisk to break the lentils up a bit. Set aside.

Heat the oil over and medium heat and add the onions, fry gently for around 6 mins, stirring to ensure they do not burn?

Add the cumin seeds, ginger, chillies and onion, continue to cook for another 4-5 mins.

Blend the tomatoes and garlic to a purΓ©e then add to the pan.

Now add the rest of the spices and 100ml water to the pan and stir well.

Add the lentils. Season and leave over a low heat for around 10-15 mins

If necessary, add more water.

Stir in the chopped coriander and stir. Lush!!!

LASAGNE

Lasagne

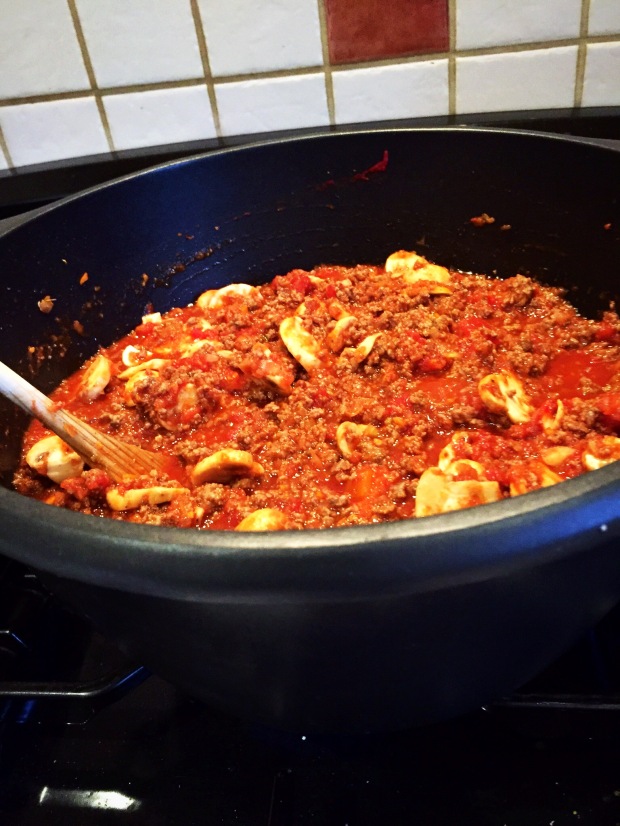
Following on from my recipe for my Ragu Bolognese, a few extra steps gets you a lasagne! Boom!

Grab, a Pack of Lasagne Sheets
Butter

So, you have made your Ragu Bolognese, now to convert your Ragu Bolognese into lasagne….

Heat the oven to 180c
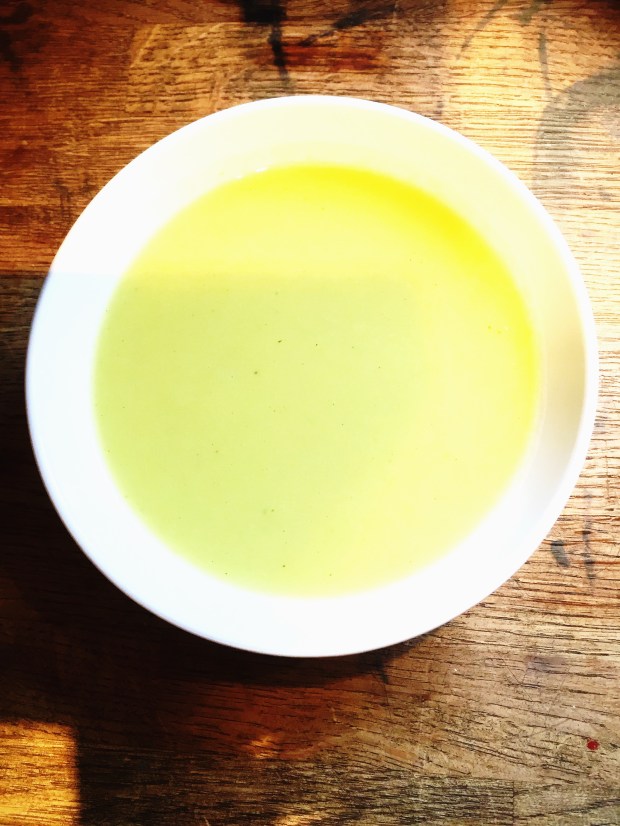
BΓ©chamel Sauce

This is the basic white sauce recipe for many dishes. In this instance, lasagne! The classic recipe has a blade of mace and nutmeg in it, I have left these out. Also, for a lasagne, you cannot have enough of the stuff, I have learnt through past attempts to double the quantity as it is better to have too much than run out!!

So for a large lasagne serving 6-8 people, double up the quantity stated here!

600ml Semi-skimmed milk
1 Onion, peeled and halved
1 Bay Leaf
6 Black Pepper Corns
55g Butter
55g Plain Flour
200g Cheddar Cheese
Maldon Sea Salt and Black Pepper

Pour the milk into a heavy based saucepan and add the onion, bay leaf and pepper corns.

Gently bring to the boil then remove from the heat. This ensures your milk does not burn.

Cover and set aside for 15 mins to infuse, then strain into a jug.

Clean the pan, then add the butter over a medium heat until melted.

Add the flour, cook gently stirring occasionally for around 1 minute. Take care not to burn the flour.

Now for the tricky bit…add the milk, gradually whisking with a balloon whisk after each addition. Don’t stop whisking or it could go lumpy.

Return the pan to the heat, whisking continuously and bring to the boil.

Reduce the heat and simmer really gently for 2 mins stirring from time to time. It should be smooth and thick.

Add the cheese and stir from time to time until melted. Add salt and pepper to taste.

Now to assemble the lasagne.

Melt a small amount of butter and using a pastry brush, coat the entire bottom and sides of your dish. This stops it from sticking.

Lay your first layer of lasagne sheet on the bottom of the dish, top with the ragu, keep it nice and neat and flatten it a bit, top with a drizzle of the BΓ©chamel sauce.

When doing your layers of lasagne, keep them nice and neat with as little overlap as possible but no gaps for the sauce to fall through.

Now add another layer of lasagne, and again top with the ragu and some BΓ©chamel.

Whilst adding your BΓ©chamel just ensure you always keep the majority for a nice thick layer on the top.

Finally add the last layer of lasagne and top with lots of gorgeous BΓ©chamel!

At this stage you are ready to pop it into the oven for around 40-50 mins, until cooked through and nice and golden on top.

Or if you prefer, you can finish at this stage and freeze for a later date.

A bit of work to get it all put together…once it is in the dish…reeelax!!

BOLOGNESE RAGU

BOLOGNESEΒ RAGU

image

An oldie but a goodie! I make a huge pot of this and get enough for Spag Bol and a Lasagna. The sauce is packed with secret veggies so it is perfect for fussy eaters! If you are doing both, double up on quantities.

Serves 6

1.2 kg Minced Beef
1 Large Carrot, whizzed in a food processor
2 Sticks Celery, whizzed in a food processor
1 Large Onion, whizzed in a food processor
2 Garlic Cloves, crushed
2 Tins Chopped Tomatoes
2 tbsp Tomato PurΓ©e
1 tsp Oregano (dried)
350g Mushrooms, sliced
200ml Beef Stock
150ml Red Wine(give or take a bitπŸ˜‚πŸ˜‚)
Dash of Olive Oil

Start by browning the mince in a large heavy pot. Keep the heat quite high, and break it up so it is nice and fine with a wooden spoon. I like to minimise the fat content in my cooking, so as I am going along, I pour a lot of the fat out of the mince, not all of it! Some may argue this compromises the taste, however I beg to differ.

Remove mince from the pan. Add a dash of olive oil and heat, throw in the onions. Soften for 5-7 mins.

Add the carrot, celery and garlic and continue to soften for another 3-4 mins.

Return the beef to the pot.

Chuck in the mushrooms.

Add the oregano and mix through.

Add the tomato purΓ©e and mix through.

Add the wine and cook for two mins.

Add the tins of tomatoes and the beef stock, bit by bit. Don’t add it all if it is looking too sloppy.

Cover and turn down the heat to a gentle simmer for 30-40 mins.

Serve with your pasta of choice and enjoy!

THAI PULLED PORK WITH ASIAN SLAW

THAI PULLED PORK WITH ASIAN SLAW

Thai pulled pork

Fancy a bit of pulled pork with a punch? Then this wee number is the one for you! Superbly tender and succulent served with a wonderfully contrasting crispy slaw…delish ❀️

For the Pork
1.6kg Boneless Pork Shoulder
2 tbsp Thai Red Curry Paste
6 tbsp Coconut Cream
2 tsp Thai Fish Sauce
1 Lemongrass Stalk, finely chopped
2 Kaffir Lime Leaves, torn into pieces

For the Asian Slaw
Finely Grated Zest and Juice of 2 Limes
2 tsp Fresh Ginger, peeled and grated
1 Red Chilli, deseeded and chopped
1 tsp Light Brown Sugar
2 Large Carrots, peeled and grated
8 Radishes, trimmed and finely sliced
4 Spring Onions, trimmed and finely sliced
1 Cucumber, seeds removed and cut into julienne strips
4 tbsp Fresh Coriander, chopped
1 tbsp Toasted Peanuts, roughly chopped

Preheat oven to 220c

Line a roasting tin with foil, leave enough overlap to cover the pork later.

Unroll the pork and dry it off with kitchen roll and place in the tin.

Mix the curry paste, coconut cream and fish sauce.

Rub half of the mixture over the pork both sides and roll up again.

Place in the oven for 30 mins uncovered to enable the top to brown.

Turn the oven down to 150c, remove the pork, and add the lemon grass and lime leaves to the bottom of the tin. Return the pork and cover with the foil.

Cook for at least 5 hours or until totally tender.

At the end, increase the oven to 220c and uncover the pork. Allow to cook for ten minutes to crisp up. Remove from oven, cover with the foil and allow to rest for 30 mins.

While resting make the slaw. Start by mixing the limes juice, zest, chilli, ginger and sugar. Stir until the sugar dissolves.

Add the rest of the prepared slaw ingredients to a bowl and pour over the dressing, toss to ensure everything is coated.

Finally, using two forks, shred the pork into chunky pieces and stir in the rest of the paste and mix well.

Serve with the slaw….enjoy this delightful wee combination! X

Fillet Steak with Chilli Sweet Potatoes

FILLET STEAK WITH CHILLI SWEET POTATOES

Fillet steak chilli sweet potatoes

Warning!!!! This dish is super healthy and super tasty!!!

Serves 1

1 Lush Thick Fillet Steak
1 Sweet Potato
1/2 tsp Hot Chilli Powder
Olive Oil
Maldon Sea Salt and Black Pepper

Heat oven to 180c

Peel and chop the sweet potato into wedges.

Throw the sweet potato into a freezer bag, add a dash of oil, the chilli powder and some salt and pepper.

Mix it up well in the bag, add to a heated oven tray and cook for 30-40 mins until soft and golden.

Just before the potatoes are ready, it is steak time!
Season both sides with lots of salt and pepper.

Add a dash of oil to a heavy frying pan. Heat until super hot and then add the steak.

Cook according to how you like a steak…there is no set time to cook it, as they vary in size and thickness. However I remember once hearing a steak cooking guideline which I feel is fairly accurate. Using your index finger against your forehead for well done, chin for medium and cheek for rare!

Serve with steamed broccoli or spinach for a guilt free tasty treat! πŸ˜‹

Delicious Carrot Cake

Delicious Carrot Cake

Carrot Cake image

I, for some reason always felt a bit scared of making a carrot cake. As my sisters birthday approached, I asked her what her favourite cake was….she said ‘Carrot!’😱😱😱
Left with no option, I did a bit of research, and came up with this rather simple (as it turned out!!) yet delish cake!

4 Free Range Eggs
200ml Sunflower or Vegetable Oil
250g Carrots, coursely grated
100g Walnut Pieces (chopped whole walnuts) Keep a few whole for decoration.
Zest of One Orange
200g Self Raising Flour
2 tsp Mixed Spice
1 tsp Bicarbonate of Soda
1/4 tsp Fine Salt
200g Light Muscovado Sugar

Frosting

150g Unsalted Butter at Room Temperature
45g Caster Sugar
300g Full Fat Cream Cheese

Pre-heat oven to 180c
Grease and Line a 20cm Round Cake Tin with grease proof paper.

Break eggs into a bowl and lightly whisk.

Add the oil and whisk again until combined.

Add the carrots, walnut pieces and orange zest and mix through.

In a separate bowl sift the flour, mixed spice, bicarbonate of soda and salt, then stir in the sugar.

Add the wet mixture to the dry ingredients. Mix well to combine ensuring there are no pockets of flour.

Spoon into the lined tin and bake for 1-1 1/4 hours until nicely risen and golden all over.

Remove from the oven and set aside to cool inside the tin for 10-15 mins.

Now turn it out onto a wire rack to cool completely.

For the frosting, place the butter and caster sugar in a bowl and beat well until light and creamy.

Add the cream cheese and beat until smooth.

Spread the frosting over the top and sides and decorate with walnuts.

N.B. Cake without frosting will keep for a week and can be frozen for a month. Once the frosting is on keep chilled.